
Have you ever wanted a new shelf in your home but can’t afford the nice-looking ones in stores? Well, we’re here to tell you that there’s a much cheaper way to acquire one.
Building your own shelf can be quite an enjoyable task. There are so many different kinds to choose from.
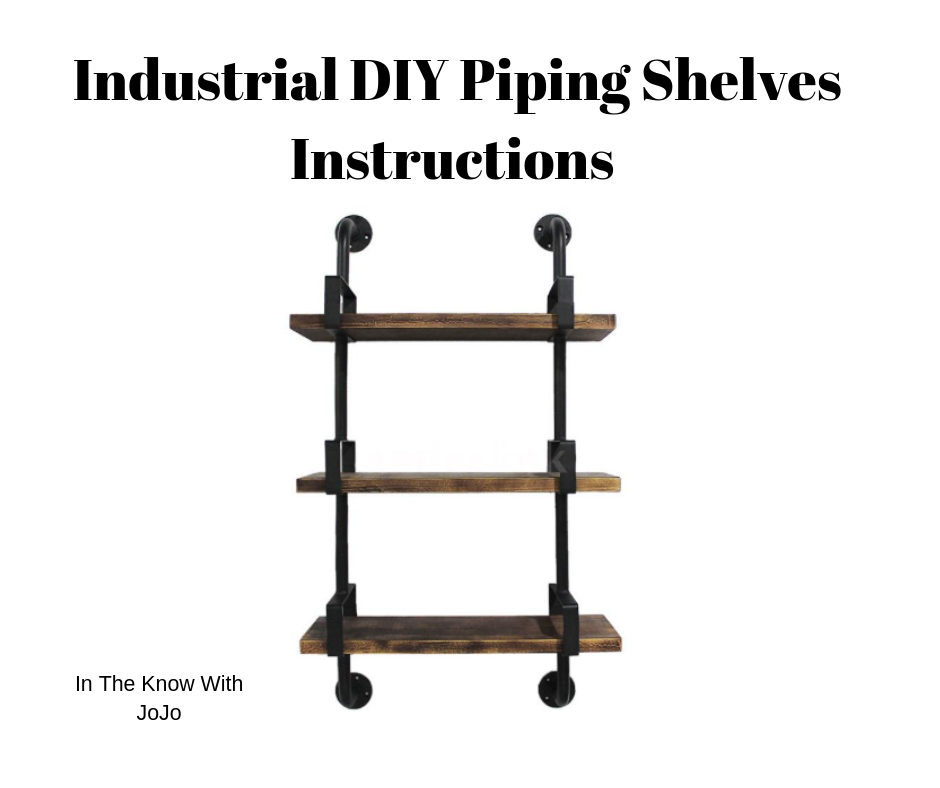
Today, we’ll teach you how to build heavy duty industrial piping shelves. By the time you’re done reading, you’ll realize that almost anyone can build one of these in their own spare time. Take a look!
Materials
· Two-foot-long pipes
· Two 1/2-foot pipes
· Two 1/3-foot pipes
· Three ¼-foot pipes
· Six 90-degree elbows
· Three ¾-inch floor flanges
· One ¾-inch tee
Aside from the wood, it is up to you on what color pipes you wish to purchase. Black tends to be the go to choice, but it is your house and your aesthetic to work out.
Steps to Complete Your Heavy-Duty Industrial Piping Shelf
#1 Set Up Your Pipes
You can set up your pipes in whatever fashion you prefer for each shelf. Some people like to have even shelves at the same level while others prefer layered shelves. Also, make sure you check out IIRnTree.com for some of the best industrial pipe shelves out there.
Whatever you decide, the main thing to remember is that you need to adjust the size of your pipes and your wood if you want different shelves. So long as you adjust the above measurements at the same ratio as all the rest, a smaller or larger shelf should turn out the same.
One other point we wanted to make is that you should start from the ground if you plan to build more than two or three shelves at once. The more shelves you install, the heavier it will be. This is just a safety measure.
#2 Cut Your Wood
Your choice of wood can vary depending on the aesthetic you’re going for. Just make sure that whatever wood you choose is strong but not too thick.
You also need to make sure that your wood is cut at the exact same length as your piping support. If it is too long, it will look tacky. If it is too short, it will fall off!
You’ll need the perfect balance between wood and piping and you have to know that it is perfect before you even begin assembling your shelf.
#3 Drill the Holes
Now, you need to make holes big enough to fit the pipe supports through the wood. Make sure that the wood isn’t to far behind the pipes, aiming at the wall. Your pipes will need to be mounted later and that won’t work if your wood reaches further than them.
You want the wood to stop just prior to the wall once everything is done, so that nothing will fall from the shelf, but the wood also won’t damage the paint on your wall.
Drill the holes in the wood to be around ½ an inch wider than the piping so that it fits through easily. Don’t make the gap too wide or your shelf won’t be stable.
#4 Put It All Together
Before you assemble anything, remember to sand your wood. You won’t be able to sand it after it gets attached to the pipes, so doing this first is quite important. You should also use a finishing spray on the wood after sanding it.
All that you need to do now is glue the wood onto the pipes (using an invisible construction-grade glue preferably) and then mount your finished shelves. So long as you perform all of these steps carefully and accurately, you should now have one or several fantastic heavy-duty industrial piping shelves!
Remember, you can adjust these measurements to account for the size and style of shelf you are looking for. Always remember to change the measurements using a ratio so that everything remains lined up. Good luck and happy wood-working!
We would also recommend making sure that the pipes which will support your flanges be carefully measured. If your measurements are off by even a fraction, your whole shelf will collapse.
No comments
Post a Comment